Splunk是一款强大的日志分析和采集程序
<h3>下载splunk</h3>
官网地址:http://www.splunk.com/en_us/download/splunk-light.html 下载的话需要先在官网注册一个账号才可以。
软件版本:splunklight-6.3.2版本
系统环境:Centos6.5 x86_64
IP:192.168.199.151
1.首先关闭防火墙
#service iptables stop
#vi /etc/sysconfig/selinux
SELINUX=disabled
或者
#setenforce 0
2.下载
#wget -O splunklight-6.3.2-aaff59bb082c-Linux-x86_64.tgz 'http://www.splunk.com/bin/splunk/DownloadActivityServlet?architecture=x86_64&;platform=linux&version=6.3.2&product=splunk_light&filename=splunklight-6.3.2-aaff59bb082c-Linux-x86_64.tgz&wget=true'
#tar -zxf splunklight-6.3.2-aaff59bb082c-Linux-x86_64.tgz
#mv splunk /usr/local/
<h3>安装及配置</h3>
# cd /usr/local/splunk/bin
# ./splunk enable boot-start                 (需要浏览完协议最后输入y,如下显示结果)

Do you agree with this license? [y/n]: y

This appears to be your first time running this version of Splunk.
Copying '/usr/local/splunk/etc/openldap/ldap.conf.default' to '/usr/local/splunk/etc/openldap/ldap.conf'.
Generating RSA private key, 1024 bit long modulus
...++++++
...++++++
e is 65537 (0x10001)
writing RSA key

Generating RSA private key, 1024 bit long modulus
...................................................................++++++
............................................................................++++++
e is 65537 (0x10001)
writing RSA key

Moving '/usr/local/splunk/share/splunk/search_mrsparkle/modules.new' to '/usr/local/splunk/share/splunk/search_mrsparkle/modules'.
Init script installed at /etc/init.d/splunk.
Init script is configured to run at boot.
#复制配置文件
# cp /usr/local/splunk/etc/openldap/ldap.conf.default /usr/local/splunk/etc/openldap/ldap.conf
cp: overwrite `/usr/local/splunk/etc/openldap/ldap.conf'? y
#启动服务
# /etc/init.d/splunk start
Starting Splunk...

Splunk> Be an IT superhero. Go home early.

Checking prerequisites...
    Checking http port [8000]: open
    Checking mgmt port [8089]: open
    Checking appserver port [127.0.0.1:8065]: open
    Checking configuration...  Done.
        Creating: /usr/local/splunk/var/lib/splunk
        Creating: /usr/local/splunk/var/run/splunk
        Creating: /usr/local/splunk/var/run/splunk/appserver/i18n
        Creating: /usr/local/splunk/var/run/splunk/appserver/modules/static/css
        Creating: /usr/local/splunk/var/run/splunk/upload
        Creating: /usr/local/splunk/var/spool/splunk
        Creating: /usr/local/splunk/var/spool/dirmoncache
        Creating: /usr/local/splunk/var/lib/splunk/authDb
        Creating: /usr/local/splunk/var/lib/splunk/hashDb
    Checking critical directories...    Done
    Checking indexes...
        Validated: _audit _internal _introspection _thefishbucket history main summary
    Done
New certs have been generated in '/usr/local/splunk/etc/auth'.
    Checking filesystem compatibility...  Done
    Checking conf files for problems...
    Done
    Checking default conf files for edits...
    Validating installed files against hashes from '/usr/local/splunk/splunklight-6.3.2-aaff59bb082c-linux-2.6-x86_64-manifest'
    All installed files intact.
    Done
All preliminary checks passed.

Starting splunk server daemon (splunkd)...
Generating a 1024 bit RSA private key
.++++++
..............++++++
writing new private key to 'privKeySecure.pem'
-----
Signature ok
subject=/CN=luoji/O=SplunkUser
Getting CA Private Key
writing RSA key
Done
                                                           [  OK  ]

Waiting for web server at http://127.0.0.1:8000 to be available.. Done


If you get stuck, we're here to help.
Look for answers here: http://docs.splunk.com

The Splunk web interface is at http://luoji:8000
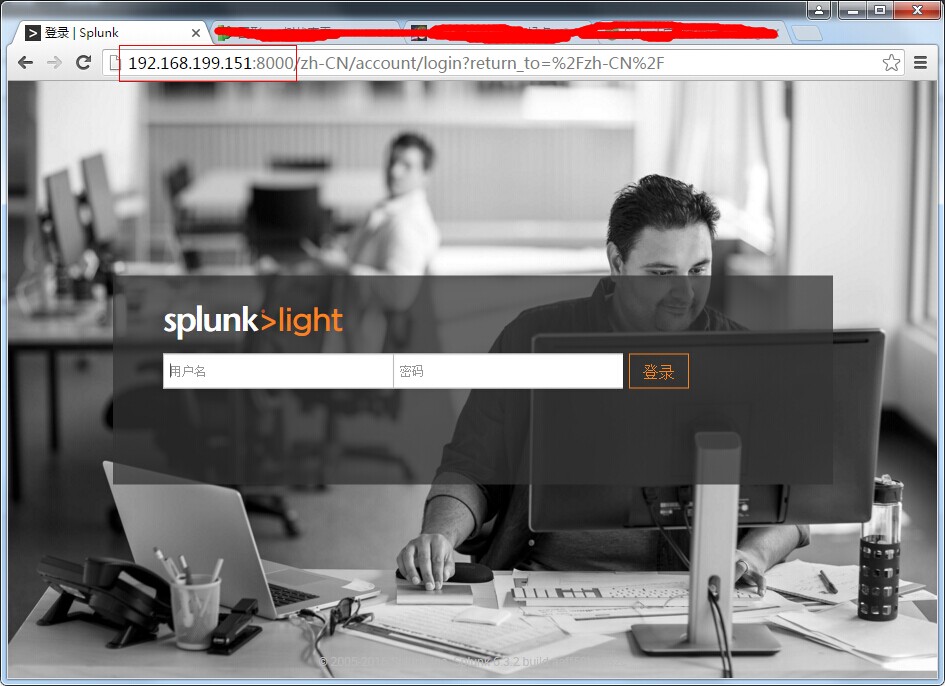
在浏览器地址栏访问:http://192.168.199.151:8000,输入提示的账号及密码即成功访问,至此安装结束!

本文由 Mr Gu 创作,采用 知识共享署名4.0 国际许可协议进行许可
本站文章除注明转载/出处外,均为本站原创或翻译,转载前请务必署名
最后编辑时间为: Mar 1, 2018 at 11:23 am
