Flask 架构简介
Flask是一个微架构,这个微并不代表Flask把整个web应用写在一个文件中,微架构意味着Flask旨在保持核心简单和极强的扩展能力。Flask并不像Django一样,替你做出选择:比如使用何种数据库。而Flask的使用是依赖两个外部库, Jinja2 模板引擎和 Werkzeug WSGI 工具集,即使是这样,你也可以选择自己喜欢的模板来替换他们。
安装Flask模块
Flask依赖的两个外部库Werkzeug 和 Jinja2
pip install flask
简单小程序
from flask import Flask

app = Flask(__name__)

@app.route('/')
def hello_world():
    return 'Hello World!'

if __name__ == '__main__':
    app.run(host="127.0.0.1", port=5000, debug=True)

#结果:
 * Running on http://127.0.0.1:5000/ (Press CTRL+C to quit)
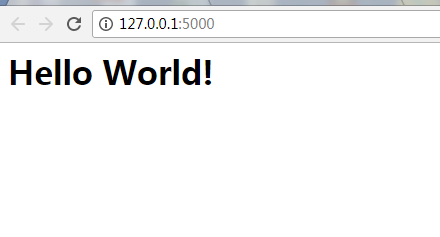
浏览器访问http://127.0.0.1:5000,截图如下:

代码解释:
- 通过import导入Flask类,这个类是所有实现的基础类
- _name_ 如果是直接运行本模块时,__name__的值为__main__,如果是其他模块调用,__name__的值为本模块的名称
app.run() 内部是一个死循环,后面不需要写任何的代码
Flask默认监听的是host='0.0.0.0',port='5000',如果想更改ip和端口,可以在run方法中进行修改。
常用方法
- 模板渲染
主要是通过render_template函数实现模板渲染。首先需要从flask模块中导入此方法。
from flask import Flask, render_template
app = Flask(__name__)

@app.route("/hello")             #第一个url
@app.route("/hello/<name>")       #第二个url,一个函数可以绑定多个route()装饰器绑定到多个URL上。
def hello(name=None):
    return render_template("hello.html", name=name)    #render_template默认会去templates目录下面去查找相对应的文件
if __name__ == '__main__':
    app.run()
新建templates目录,并创建hello.html文件,文件内容如下:
<!DOCTYPE html>
<html lang="en">
<head>
    <meta charset="UTF-8">
    <title>hello</title>
</head>
<body>

<h1>hello world</h1>
{% if name %}
    <h2>hello {{name}}</h2>
{% else %}
    <h1>there is no name...!</h1>
{% endif %}
</body>
</html>
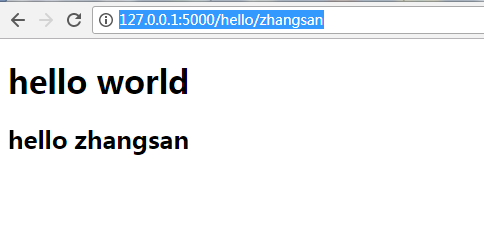
执行程序并打开浏览器进行访问:http://127.0.0.1:5000/hello/zhangsan 和 http://127.0.0.1:5000/hello
C:\Python27\python.exe "D:/Program Files/JetBrains/test_Flask/demon1.py"
 * Running on http://127.0.0.1:5000/ (Press CTRL+C to quit)
127.0.0.1 - - [07/Mar/2018 16:28:32] "GET /hello/zhangsan HTTP/1.1" 200 -     ##访问日志


- 重定向
例1:redirect方法
@app.route('/')
def hello_world():
    # return 'Hello World!'
    return redirect('/hello')
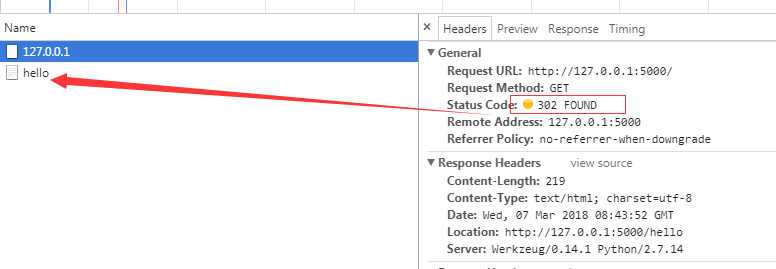
以上代码是当访问根'/'的时候,重定向到'/hello' URL,启动并访问http://127.0.0.1:5000,结果如下

例2:立刻向客户端返回400错误的状态码
@app.rout('/check')
def f_check():
    abort(400)
- 路由详解
1.带变量的路由
要给 URL 添加变量部分,你可以把这些特殊的字段标记为 <variable_name> , 这个部分将会作为命名参数传递到你的函数。规则可以用 <converter:variable_name> 指定一个可选的转换器。这里有一些不错的例子:
@app.route('/user/<username>')
def show_user_profile(username):
    return 'User {0}'.format(username)
@app.route('/post/<int:post_id>')
def show_post(post_id):
    return 'Post %d' % post_id
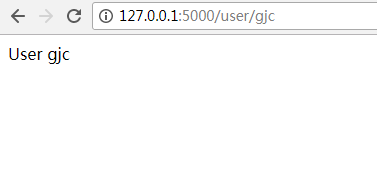
浏览器访问结果如下图:

2.转换器有下面几种
Int 接受整数
float同 int ,但是接受浮点数
path和默认的相似,但也接受斜线
string 字符串
@app.route('/projects/')
def projects():
    return 'The project page'
可以访问 http://localhost/projects/
可以访问 http://localhost/projects
@app.route('/about')
def about():
    return 'The about page'
不可以访问 http://localhost/about/
可以访问 http://localhost/about
3.http方法绑定
网站通过http与浏览器或者其他客户端进行交互,而http访问一个url时,可以使用几种不同的访问方式。包括GET, POST, HEAD, DELETE等。在flask中,默认设置使用GET方式访问路劲。
@app.route('/login', methods=['GET', 'POST'])
def login():
    if request.method == 'POST':
        do_the_login()
    else:
        show_the_login_form()
methods用来指定http请求url的方式, 可以指定get和post请求,request.method属性可以获得本次HTTP请求的访问方式。
4.路由地址反向生成
前面我们已经掌握到url绑定到映射函数的方法,但是有时候程序中需要通过函数名获得其绑定的url地址,Flask通过url_for函数来实现这个功能。
from flask import Flask, url_for
app = Flask(__name__)

@app.route("/")
def f_root():
    pass

@app.route('/industry')
def f_industry():
    pass

@app.route('/book/<book_name>')
def f_book(book_name):
    pass

with app.test_request_context():
    print(url_for('f_root'))
    print(url_for('f_industry'))
    print(url_for('f_industry', name='web'))
    print(url_for('f_book', book_name='Python Book'))
结果:
/
/industry
/industry?name=web
/book/Python%20Book
url_for会自动处理必须的特殊字符转换和unicode编码转换。如上面的空格转换成%20。
本文由 Mr Gu 创作,采用 知识共享署名4.0 国际许可协议进行许可
本站文章除注明转载/出处外,均为本站原创或翻译,转载前请务必署名
最后编辑时间为: Mar 7, 2018 at 05:13 pm
